MY TOP FIVE LANDSCAPE TIPS

I had the pleasure to travel back to Trondheim Norway recently since the beginning of covid. During my stay in Trondheim we decided to make a quick top five tip video on landscape photography with some post process in the end.

Have a look on my YouTube channel and let me know if you want more of these videos and what type of videos you would want.


Nomatic - McKinnon Camera Pack 35L

So this is my 6 months review of this fantastic camera backpack. Yes that is correct. This is the best camera backpack/backpack system that I have ever tried. The quality is superb, the attention to details, layout, ergonomics and looks. I’m a big fan of it’s simple design and black colour. And I quite like the subtle pirate logos. It is very comfortable on my shoulders and waist. I’ve been able to use it a lot lately. Carrying it for hours on long walks during back to back shoots for days in a row. I’ve filled the backpack up with 2 cameras, 3 lenses, a sound recorder, 2 rode wireless mics, 1 rode shotgun, 2 aputure al-f7 light panels, two atomos monitors (ninja v and shinobi) laptop 13”, filter pouch, memory card case, my videocamera’s top handle, my bag of cables, 4 Sony NP batteries for monitors and lights, 3 spare sony camera batteries, the dji ronin-s, nisi filter holder and a few other asseccories.

Having the small backpack in the main one is so nice. Once I have arrived to the locations I can have a main base for my bag and carry my handheld rig in the small backpack. It has a main compartment that fits the whole handheld rig, and a pocket inside the main compartment where I can store batteries and memory cards. In the compartment underneath I have room for other lenses, audio equipment etc. You could also have your drone in this if needed.

In my main bag I got the ronin-s in the front compartment. The compartment can be expanded and there is room behind a mash in the front for my gimbal. I find the backpack easier to carry when having the weight balanced. This helps me balance the weight easier than having it on the outside of the backpack. The size of the backpack means that it can be used as a carry on on a plane. Having the opening on the back means I feel more secure about things not being nicked. But it also means it has to lay on its front or stay upright while opening it. This means the front is more prone to wear and tear. But I haven’t seen much tear there. The small scratches on it is subtle and fits in with the pirate design and branding.

I love the small compartment in the front to store things I may need fast like my lens cleaning cloths from Zeiss. The handle on top of the backpack is very comfortable. It also have a smaller handle on the top. The front extends and makes room for my ronin-s. the inside also got a small compartment for a iPad and the laptop compartment is outside the main compartment and makes it easy to get my laptop in and out without having to open the whole backpack.

This Backpack is fantastic, and I highly recommend it!

IMG_8378.jpg

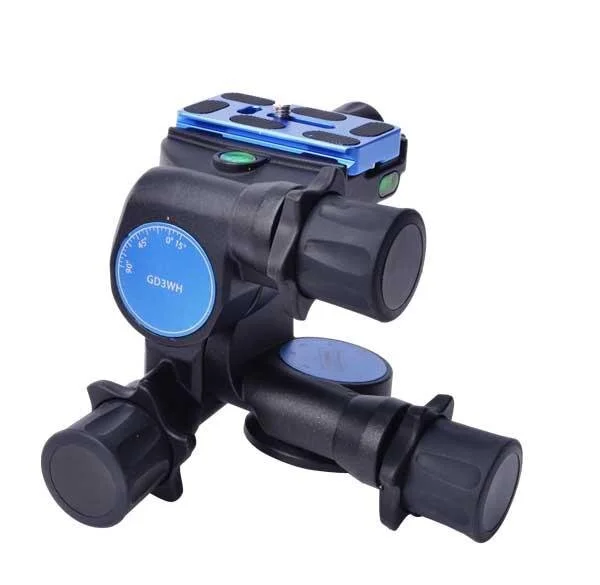
My New Benro GD3WH Geared Head is great!

When I started up with landscape photos I invested in a Induro tripod with a 3 way head. The most popular photos I sell to clients are all taken with the 1Ds III and a Canon 17-40mm f/4 on this Induro tripod and 3 way head. Unfortunately this 3 way head was not the best quality. it was the low end of price range. Add to it that I did use it alot. In the end the arms that you adjust the 3 way head angles stoped functioning. It also did not have a arca swiss mount. After this 3 way head stop functioning I invested in arca swiss ballheads. I’ve used ballheads for a long period now. They are great and have their use. And I currently have the Gitzo GH3382QD. Great ballhead by all means, but for me it is not ideal when I shoot landscapes. The reason is that when I need to make small adjustments fast, I almost always fail, when using a ballhead. My new purchase is the Benro GD3WH Geared Head. This has a arca swiss plate that allows me to use my L-plate from 3 legged thing. Benro 3 way geared head allows me to make small adjustments fast, is well made, and do not have long arms that easily breaks like the induro one I used to have. Highly recommend you trying this geared 3 way head if you are doing landscapes most of the time. It has brought back the joy of taking landscapes for me. Little did I know that the ease of use of the 3 way head and the cumbersome ballhead had this much impact on the experience of taking landscape photos, and maybe that also shows in the end product.

Benro GD3WH Geared Head

Benro GD3WH Geared Head

My most essential Landscape Gear in Trondheim

Here is the list of the photo gear I tend to carry with me when I’m out taking landscape photos, and the reasons why.

  • Kamera: So my choice of camera to do both video and landscape photos is the Sony a7rIV. It has a 61 MP sensor and can deliver 4k video and slow motion full HD. It also has great dynamic range which makes it alot easier in the post process work when it comes to editing highlights and shadows. I expose to the Highlights, and push them as far as I can without burning the highlights out.

  • Lens: Lenses can vary depending on where and what I’m shooting. But my most used ones for landscape is the 16-35mm f/2.8 GM and the 70-200mm f/2.8 GM. The one I use the most would be the 16-35mm f/2.8 GM. This is a very sharp lens and it is the right focal lengt range for taking landscapes of Trondheim ,the way I want to. The focal lengts in between 35-70 is not something I have found to need that much, and not having the extra weight is worth not adding more lenses.

  • Filters: I use the filters from Nisi Filters. But any kind of filter-system is what I would prefere. Mine has a integrated polarisation filter and possibilities to add graduated filters GND or just plain neutral density filters ND. This way you have more control in situations were you either need a lower shutter speed with adding a ND filter, pull down the exposure in the highlights with the GND, bring forth the colours with the polarisation filter or remove the reflection in reflecting surfaces as the surface of the water. This system brings me alot of creative control without having to take multiple exposures and blend it all together in photoshop. I find myself using the polarisation, a soft graduated filter and a ND filter all together most of the time.

  • Tripod: I have a Gitzo tripod with a Benro 3 way head. This is a light weight tripod, but very sturdy. The tripod head is geared which gives me more precise control on adjusting angles when I level up. I also have this mounted on a adjustment plate from manfrotto if I need to take panoramas. This way I don’t need to level up the tripod legs. I can just put up the tripod in a sturdy position and then adjust the level plate to get the paning with the 3 way head straight. If you don’t level up the tripod with either the legs or the level plate, you will get a incline on your panning with the tripod head.

  • Camera plate: I use a L-Plate from 3 legged thing. This way I can easily change from landscape orientation to portrait orientation without having to change my composition. Highly recommended. Especially if you all of a sudden want to change between these modes during a sunset.

  • Remote Trigger: This is very nice to have, so you don’t touch the camera while taking photos. It also let you stand at a distance from the tripod. Many times you can create shake by moving around too close to the camera while you are taking photos.

  • Extra Battery and Memory Cards: I try to always keep an extra pair of memory cards and batteries with me. You don’t want to run out of either one of them!

  • Also it is nice to bring some snack, cloth to wipe of water drops, rain cover (peak design shell cover) and something to drink.

Choosing the right Profoto flash for you!

There are many factors when it comes to choosing the light you need for the photography you do.

Having some experiance as a Profoto salesman I know that the most important one is the budget. Buy what you can afford would be my first advice. For me as a working professional, I want it to pay off and earn back several times over. Buying gear is an investment in my work. It is about finding the right tool to make your work better, stand out from the crowd and/or to make the workflow easier and less time spent doing the job. Using flash makes me as a professional photographer rely less on the light that is available and thus feeling more confident.

My choice when testing different brands was to go with Profoto. The first lights was two of the Profoto B1, the Location Kit. At that time the B1X, B10 and B10 plus was not available. So it was a choice between either the B1 or the B2 in the battery category. Reason to my choice was TTL -> Manual function, the HSS function and the power range. It could shoot in low light situations without overpowering the mood in the location, and at the same time I could bring it outdoors and be sure it could handle the daylight aswell if I needed it to. This made me feel confident that what ever lighting condition I was met with, it could handle it and I’d get a picture that I and the customer was pleased with.

Now today, as I mentioned above, we have a wider range to choose from. I know it can be a bit challenging to choose between them when you are investing a great amount of money into your carrier/profession.

So the questions I always asked customers was what kind of photography do you do, what do you need the lights for, what is your budget and is weight an issue?

The price of these lights are in the same ballpark. They all come in two alternatives. The To-Go Kit option with one light or the Location Kit option that gives you two lights and a backpack. The B2 gives you the same bag on both.

Modifiers

Profoto has mainly two different modifier lines. The RFI and the OCF. RFI is the range that holds bigger more sturdy built and more cumbersome modifiers to assembly. Made to withstand alot of use and the heat from the modelling lights of the D1, D2 and Pro series of lights. These modifiers are also heavier and rely on the flash to have a sturdy mount.

The other line is the OCF which is made for the Of Camera Flash series (B1, B1X, B2, B10, B10 Plus). These are smaller, weigh less and are in general easier to assembly. The OCF speedrings are made of plastic whilst the RFI Speedrings are made of metal.

Choosing

So if you want to use the RFI line I would recommend you to go with the B1, B1X due to the fact that the mount on these workhorse flashes are more robust and can hold these bigger, heavier modifiers such as the RFI 5’ Octa or the RFI 4x6’ Softbox. They both have LED light. The B1X has a stronger one then the B1. The B1X battery is also rated for more flashes and can be used on both of these flashes. But the batteries and flashes are made in a way that don’t let you plug them into the wall socket while shooting. So especially recommend you to buy extra batteries. If you find yourself using the wall socket all the time, then the D1/D2 (no battery) are better options.

If you want the less heavier option and you want to mainly use the smaler and lighter OCF modifiers and up to a RFI 3’ Octa or the bigger umbrellas, then go for a B2, B10 or B10 Plus. Out of these three the B2 has a stronger mount, whilst the B10 Plus has the longest head to mount and adjust the modifiers.

The B2 has its flashead seperated to the aggregate and uses a cord to connect these. In some cases you can find it more practical to have the battery down at the foot of your lightstand as a weight. It also makes it easier to manually see your settings, go into the menu etc while shooting. The B2 has the same power as the B10 (250 Ws), a longer flash duration then the B10 and B10 Plus, but a faster recycle time of 1.35 seconds vs 2 seconds on B10 full power (250 Ws) and 2.5 seconds (500 Ws) on the B10 Plus on full power (2 sec on 250 Ws). The B2 can attach two heads and get you two lights that has 125 Ws if needed. The drawback is that the B2 has a less powerful LED light, but it has no fan noise which the B10 and B10 Plus has as soon as you go above 30% power. The B10 and B10 Plus do have the option to adjust the temperature of the LED light.

The battery on the B2 is good for about 215 flashes on full power, whilst B10 and B10 plus uses the same battery which is good for 400 flashes on 250 Ws and about 200 on 500Ws for the B10 Plus. All of these three lights can also be used while being plugged in to the wall socket. B10 and B10 Plus can also be used with the Profoto App. Where you can adjust every setting, update the firmware, control the lights etc.

Flash performance

B1/B1X (500Ws) HSS/TTL - 1.9 sec recycle 500Ws (1.3 sec at 250 Ws) - 1/18000 sec flash duration at power 2 - battery can do 325 flashes at full power.

B2 (250 Ws) HSS/TTL - 1.35 sec recycle 250 Ws - 1/15000 sec flash duration at power 2 - battery can do 215 flashes at full power.

B10 (250 Ws) HSS/TTL - 2 sec recycle 250 Ws - 1/50000 sec flash duration at power 2, 1/48000 at power 1 - battery can do 400 flashes at full power. AirX.

B10 Plus (500 Ws) HSS/TTL - 2.5 sec recycle 500 Ws (2 sec at 250 Ws) - 1/50000 sec flash duration at power 2, 1/48000 at power 1 - battery can do 200 flashes at full power. AirX

Other

B1/B1X -B1 20W/B1X 24 W LED light - Weight is 3 kg - £1,990.00/3,890.00

B2 - 9W LED light- Weight is 2 kg - £1,825.00 (location kit)

B10 -2500 lumens LED light Temperature adjustable 3000k to 6500k - Weight is 1.5 kg - £1,499.00/2,995.00

B10 Plus - 2500 lumens LED light Temperature adjustable 3000k to 6500k - Weight is 1.9 kg - £1,795.00/3,575.00

  • If you want to travel light, have one smal flash with good enough power output, super fast flash duration to freeze movement, Profoto App compatible, 2500 lumens LED with temperature adjustments and charge while you shoot, then Choose the B10. You will get alot of light in a smal size and you can use OCF modifiers and umbrellas.

  • If you want 500 Ws high power flash with the fastest recycle time and be able to use all of the modiifers on it, more sturdy build, and don’t need to charge the flash while you are shooting then choose the B1X. You can also change front glas on this yourself.

  • If you want everything the B10 offers but more power. You don’t need the recycle time of the B1X or the option to use the larger RFI modifiers, but you prefere a lighter and smaler flash, then choose the B10 Plus. It sits as mentioned in between B10 and B1X when it comes to the weight and size. It will have less flashes per battery then the B1X, but can charge while you shoot, and got a 2500 lumens LED light which is temperature adjustable.

  • If you want a fast recycle flash as powerful as the B10, but without all the bells and whistles as the AirX and temperature adjustable LED, then choose the B2. It has cords which may be a good or bad thing depending on how you look at it, but the flash head is very light weight, recycle is fast, you can charge while shooting, but the battery give you 215 flashes at full power, so I recommend getting minimum one spare battery.

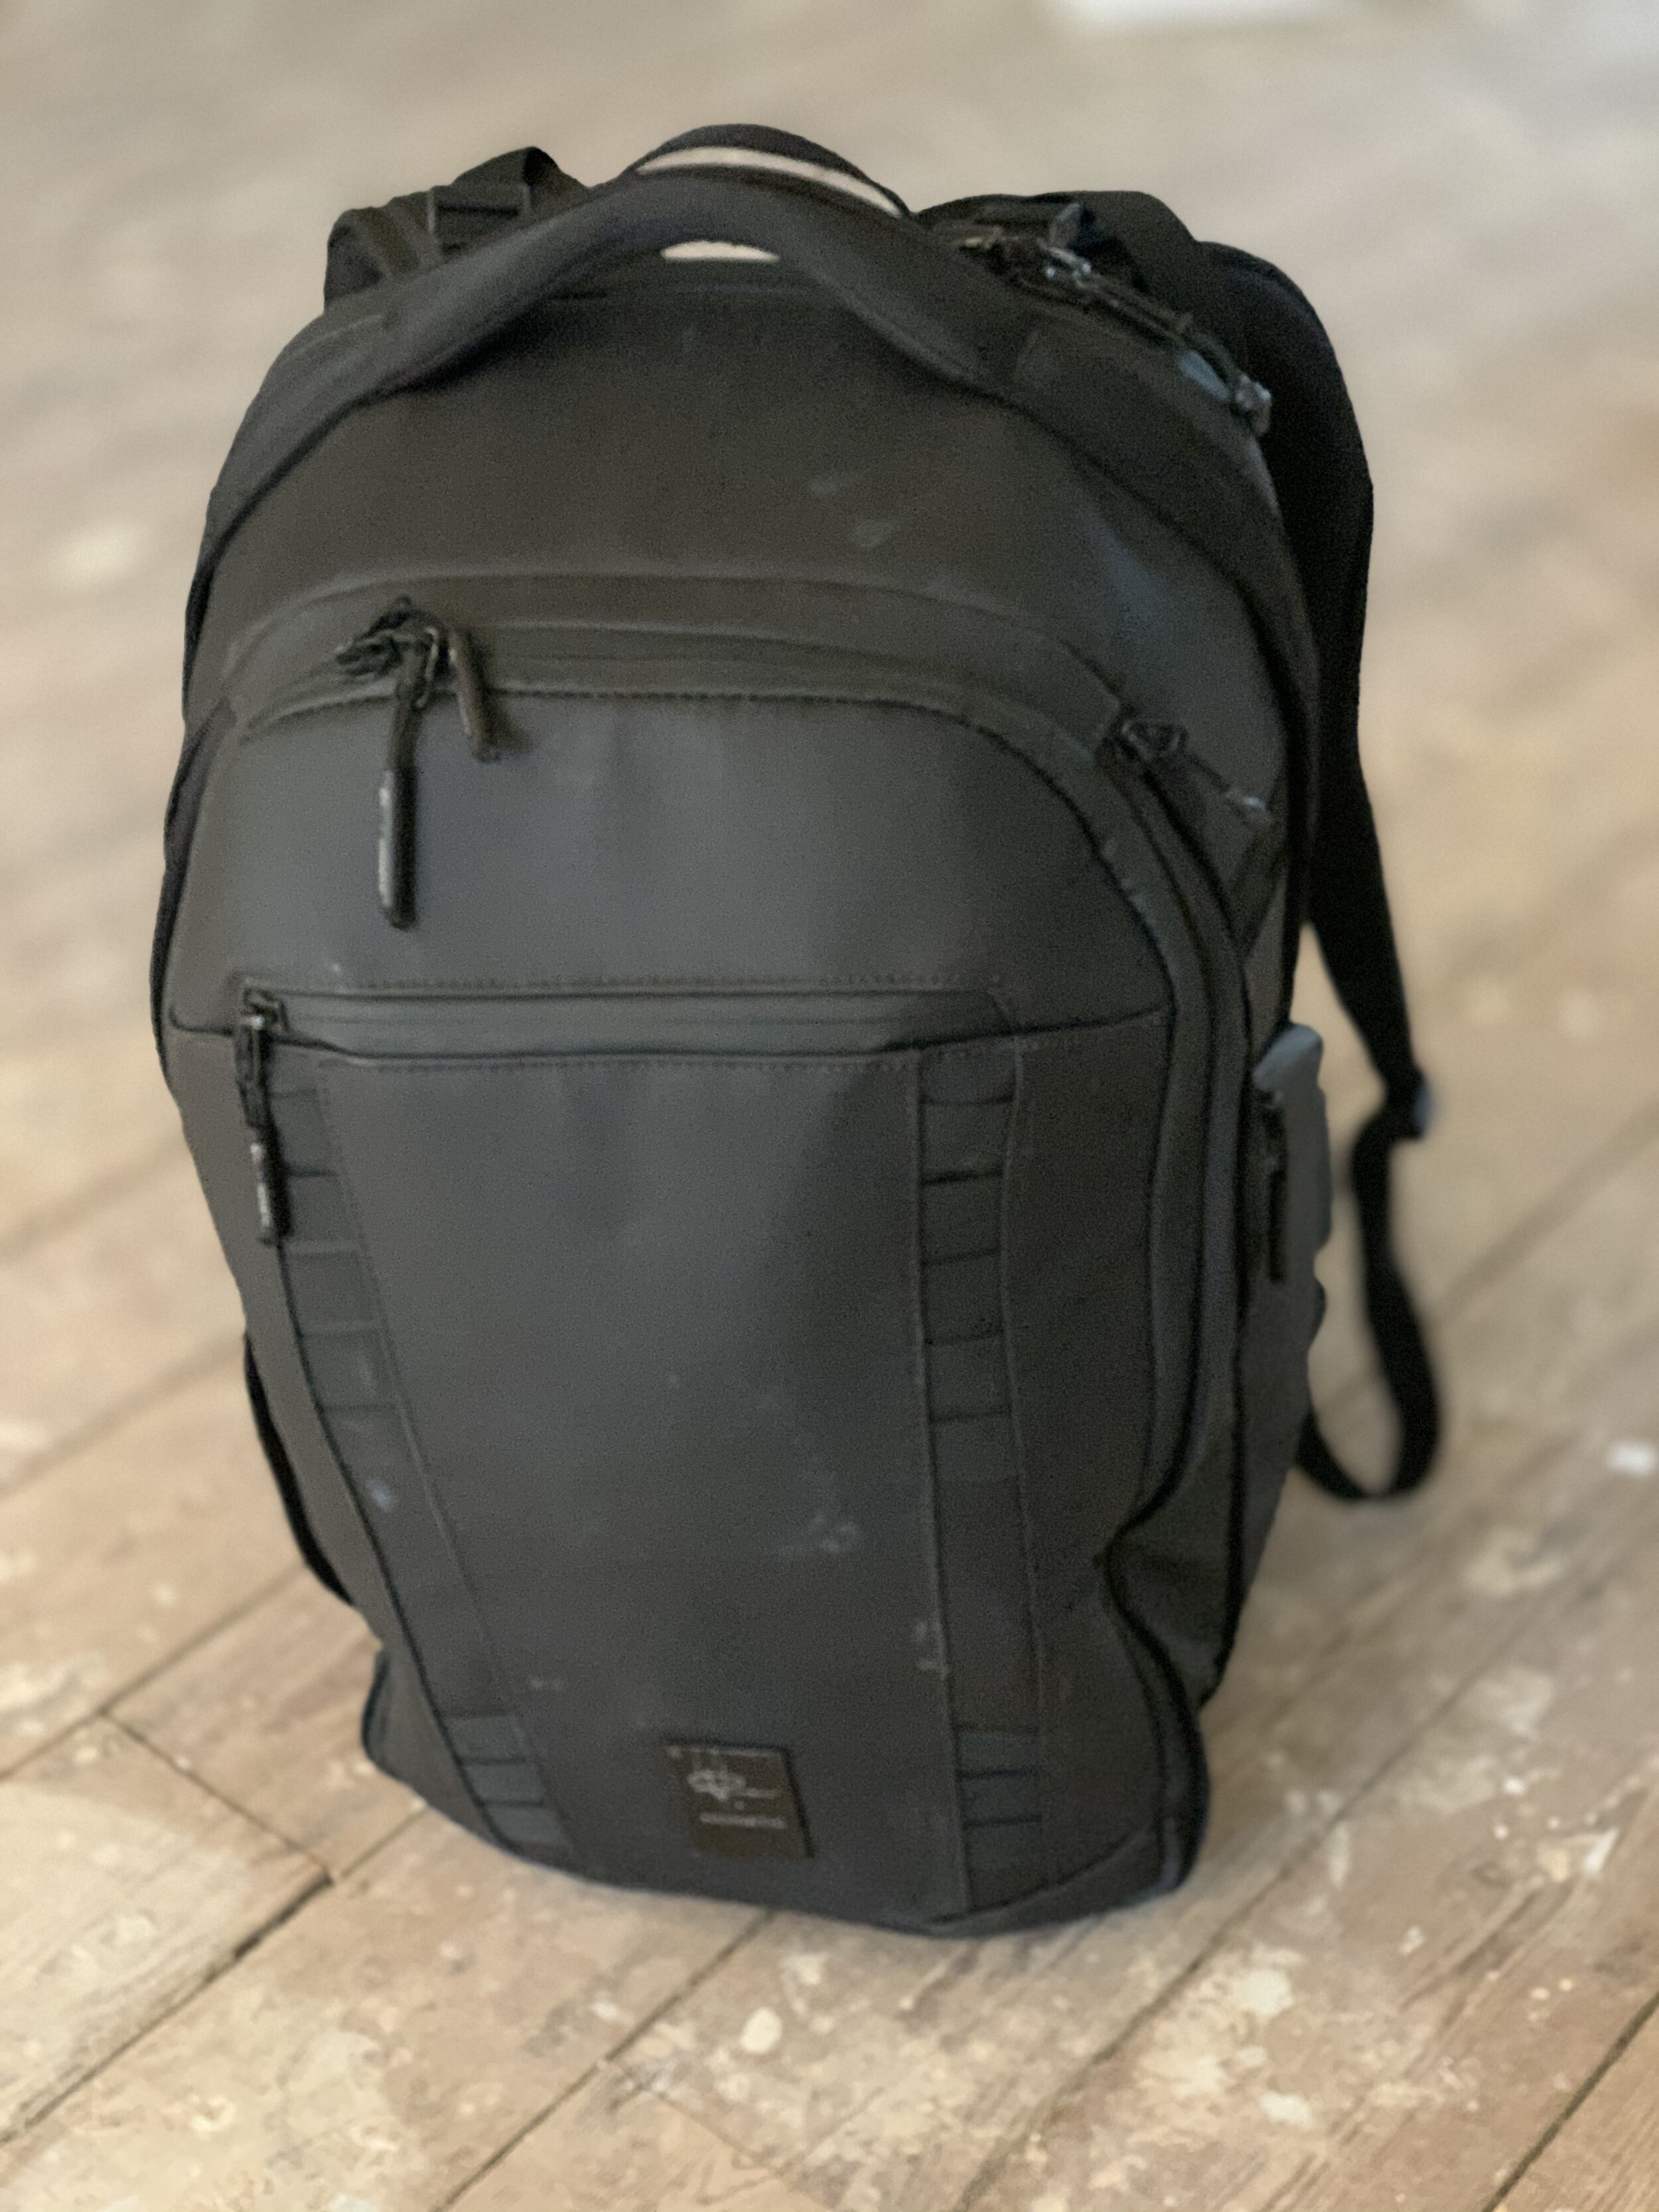
McKinnon Camera Pack 35L - Nomatic

It was my 38th birthday during the lockdown period. My awesome girlfriend arranged a surprise for me when I woke up. She had decorated the whole living room with balloons, cake, cards and presents. All wonderful things and love from friends and family. In the end she gave me a card, and inside the wonderful card there was a printed paper with the order of the Nomatic - Camera Pack Bundle with the Accessory Case. It is the backpack I have wanted for a while, but never had the budget for. Could not be happier! Today I received it and it is by far the greatest backpack I have ever had/tested/seen! All my gear fits in it. And since I have the cube pack inside the backpack, I can convert that to my daily backpack when travelling to different locations/jobs. Highly recommend it. Check out the description in my equipment list for further details how I pack it and what fits in it.

camerapackbundle_a7023684-d03b-4061-a886-4e57b8fad983_1024x1024.jpg

An Everyday Photographer & Videographer's Blog

Hi there!

Welcome to my new blog/vlog and k-log (Knut Vlog/Blog) which I so creatively chose to call this pile of upcoming text smashed into one place. The idea behind this is to write down my journey as a photographer and videographer. Covering the many aspects of it. From working as a professional to the everyday hobbyist I am trying to choose the next piece of gear that I want/need or new items I’ve already bought. Small tricks, hacks and tips. This will be my space to put out my ideas, thoughts, inspirations and ongoing projects.

Thank you for following me and I look forward to share some content!

Kind regards, Knut Aage Dahl.